CCP14
Tutorials and Examples
Peak Fitting using Xfit-Koalariet (Coelho and Cheary) for Win95/NT
Fixing Peak Shape to be 100% Gaussian
The CCP14 Homepage is at http://www.ccp14.ac.uk
[The reference to use for XFIT or FOURYA in any resulting publications is:
Cheary, R. W. & Coelho, A. A. (1996). Programs XFIT and FOURYA, deposited in CCP14 Powder Diffraction Library,
Engineering and Physical Sciences Research Council, Daresbury Laboratory, Warrington, England.
(http://www.ccp14.ac.uk/tutorial/xfit-95/xfit.htm)]
The Problem
When fitting peaks that have a large background component,
it is possible that the peaks will develop large lorentzian
tails that start merging into the background. XFIT cannot
tell what is a peak and what is background, and will thus
happily do you bidding - crunching numbers.
Following is a "trick", when followed intelligently, may
help, by fixing the shape to be 100% gaussian. In theory(?),
peak shapes in Energy Dispersive diffraction are supposed to
be pure gaussian. Though people who blindly believe these
peaks much be gaussian should refer to Figure 5 (page 818) and
Conclusion VIII (page 842) in the "International
Union of Crystallography commission on Powder Diffraction
Rietveld Round Robin. II. Analysis of Monclinic ZrO2"
By R. J. Hill and L. M. D. Cranswick, J. Appl. Cryst.
(1994) 27, 802-844. This shows the effects of the
Neutron Powder Diffraction community having the same
view with respect to their profiles.
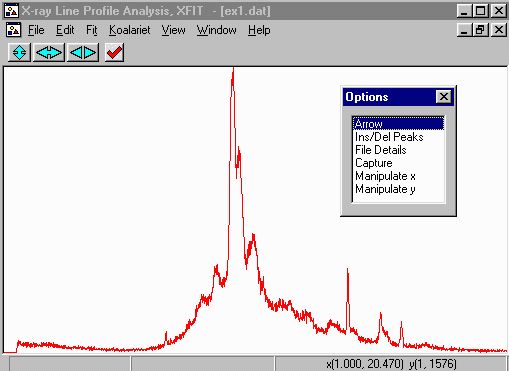
- Run XFIT, (maximise the screen if you wish)
and do File, Load Data and open
the energyd\broad\ex1.dat dataset. You can maximize the data to
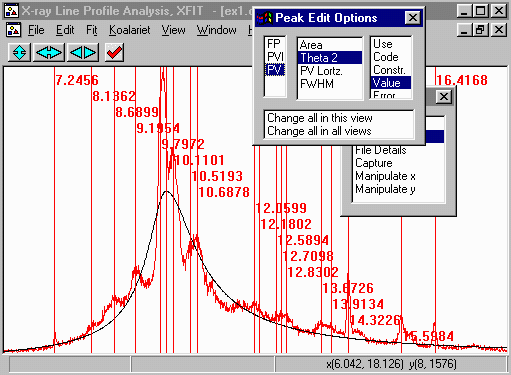
fit the entire XFIT screen. It should look something like
the following. (if you can't see the active mouse output on
the bottom right of the XFIT screen - maximise your XFIT
window)
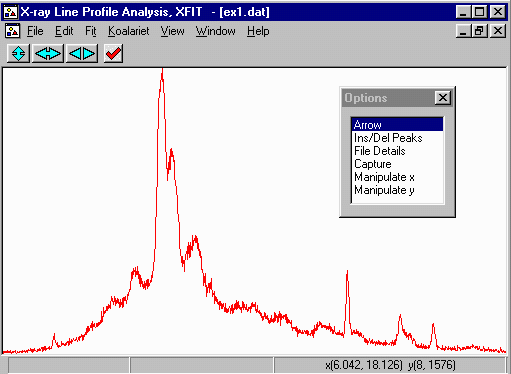
- In Arrow mode, click the left mouse key to zoom up from
the lower angle end and right mouse key to zoom up from the upper
angle end to view the 6 to 18 region in the plot window.
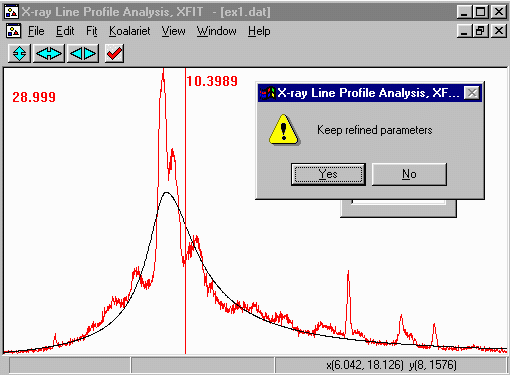
- Insert a single Split Pearson (PVII) peak and refine on this to
partially model the background.
- Now insert Pseudo-Voight peaks on the major to minor peaks
that appear above the roughly refined background.
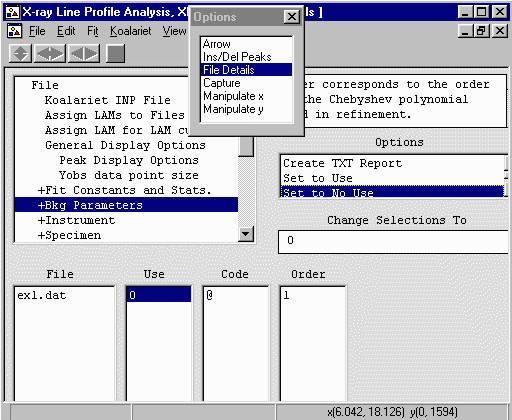
- Go into Options, File Details and Set the Background to
Set to No Use; as even a linear background can
interact in a nasty way with the broad Split Pearson peak.
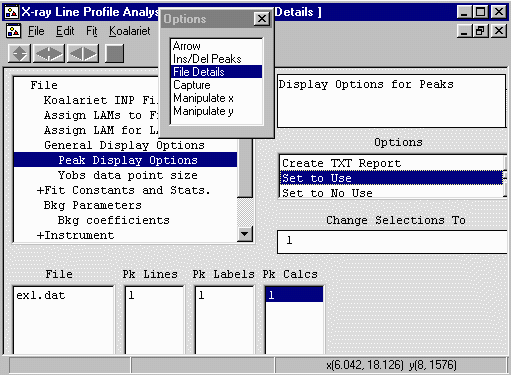
- While still in File Details, go into General Display Options.
Peak Display Options and set the Pk Calcs to Use. Thus the
individual peak profiles will be visible .
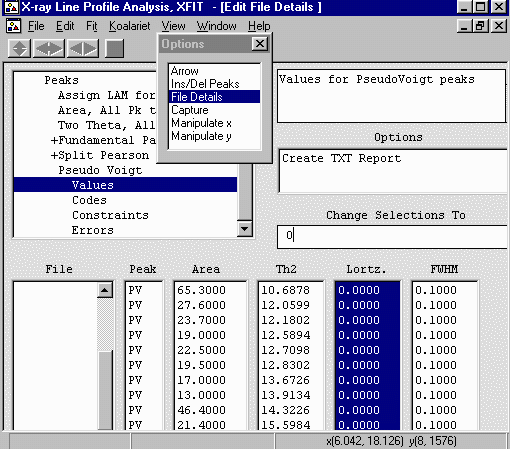
- Again, still in File Details, go into Peaks, Psuedo Voight,
Values and set the peak shapes to be 100% Gaussian by setting the
Lortz to 0 (i.e., 0% Lorentzian = 100% Gaussian). This is done
by selecting the first point with the mouse, dragging down,
then in the Change Selections Box type 0 and press
the [enter] key.
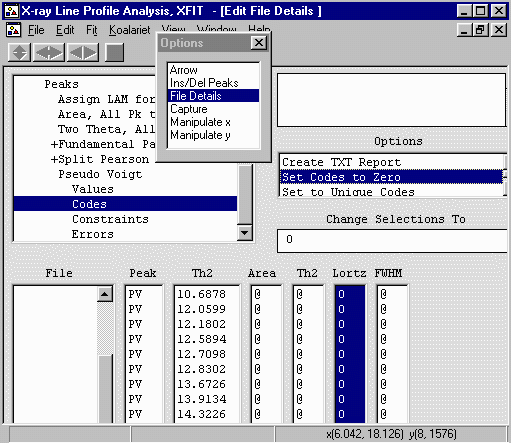
- One down in the File Details, Peaks, Psuedo Voight,
area is the Codes. Now that you have set the values to be
100% Gaussian, you have to tell the program not to refine
these away from 100% Gaussian. The @ symbol is the
programs way of saying refine on this value. As per the
above, highlight the all the values by clicking and dragging
down, then click on Set Codes to Zero and press
the [enter] key. Zero tells the program not to refine on
these parameters; in this case the shape parameters.
- Now from the main menu, select Fit, Fit Marquardt in
preparation for fitting.
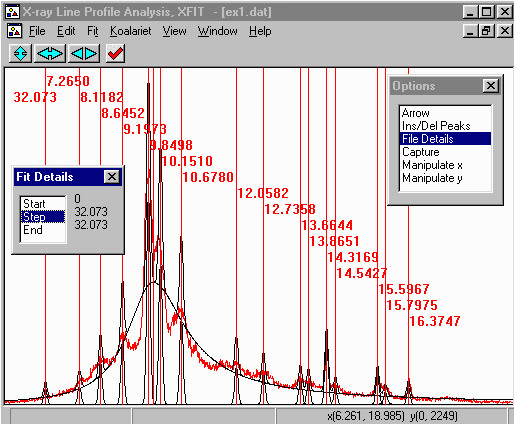
- Fit the peaks.
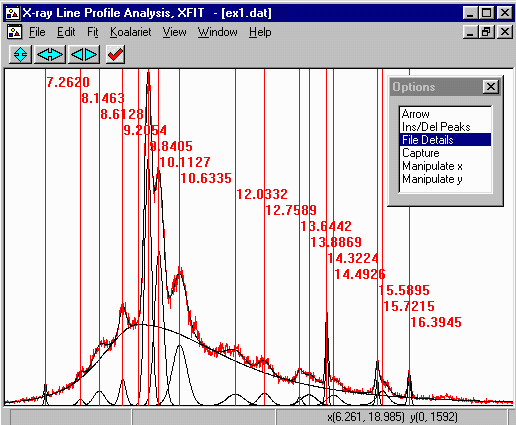
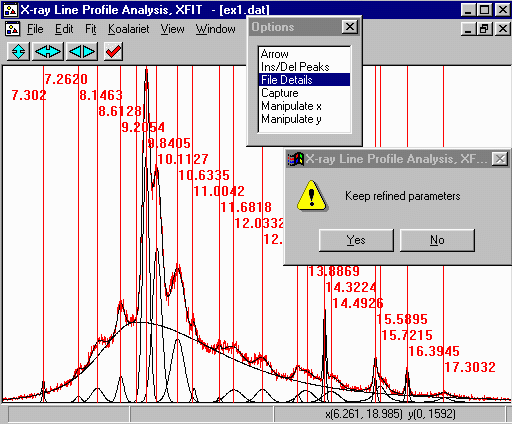
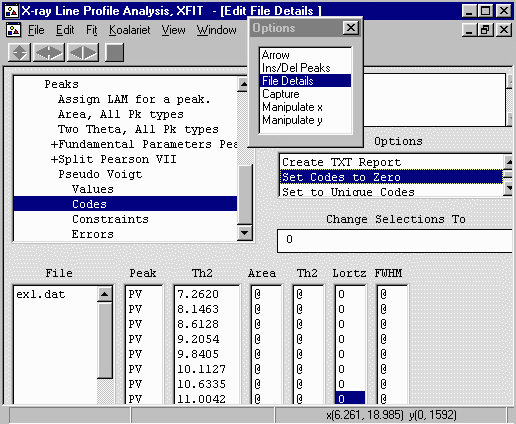
- Insert the remaining trace peaks. Then go into File Details
and as above, set the new peaks as being 0% Lorentzian (100% Gaussian)
and making sure the Lorenztian/Shape refinement flags are set to
Not Use (should be zero).
- Fit these remaining peaks and you are done. Save the project
using the File, Save Project As
