CCP14
Tutorials and Examples
Peak Fitting using Xfit-Koalariet (Coelho and Cheary) for Win95/NT
Fitting Lab XRD data using Fundamental Parameters Approach - Y2O3
The CCP14 Homepage is at http://www.ccp14.ac.uk
[The reference to use for XFIT or FOURYA in any resulting publications is:
Cheary, R. W. & Coelho, A. A. (1996). Programs XFIT and FOURYA, deposited in CCP14 Powder Diffraction Library,
Engineering and Physical Sciences Research Council, Daresbury Laboratory, Warrington, England.
(http://www.ccp14.ac.uk/tutorial/xfit-95/xfit.htm)]
Why Bother?
In the following example, we are going to go through
what it takes to fit parts of a laboratory diffractometer
using the fundamental parameters approach. This uses the
geometry of the diffractometer as well as other information
to model the contribution to the peak profiles, leaving
the size and strain to be refined. This is very stable and
requires less refinable parameters.
Other annoyances with other methods are such things as low and high
angle peak asymmetry (the low angle peak asymmetry being
primarily due to axial divergence of the X-ray beam; and
the high angle peak asymmetry being due to penetration
depth of the X-ray beam). XFIT handles this as part of
the machine geometry without the need for releasing extra
parameters.
However, the geometry, slit system, and tube
type have to be defined correctly.
This Y2O3 data was collected with
a Philips 1050 goniometer (173mm goniometer radius)
with Cu LFF X-ray tube, incident and diffracted beam
Sollers slits with 5.1 degree acceptance angles,
1 degree fixed divergence slit, 0.1mm receiving slit, 1 degree
scatter slit, diffracted beam curved graphite monochromator and
proportional counter.
Download Data
Click here to download a zip file of the Y2O3 data
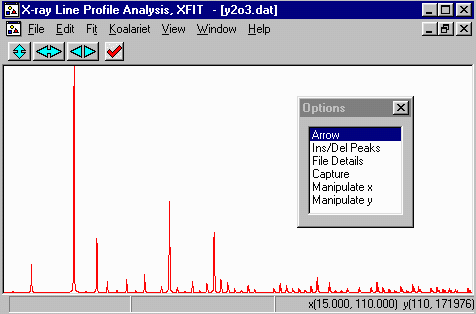
- Run XFIT, (maximise the screen if you wish)
and do File, Load Data and open
the y2o3.dat dataset. You can maximize the data to
fit the entire XFIT screen. It should look something like
the following. (if you can't see the active mouse output on
the bottom right of the XFIT screen - maximise your XFIT
window)
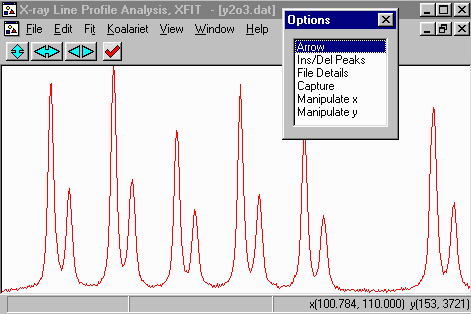
- Zoom into the area around 100 and 110 degrees. This is done
using the left mouse button to define the lower angle and the
right mouse button to define the upper angle.
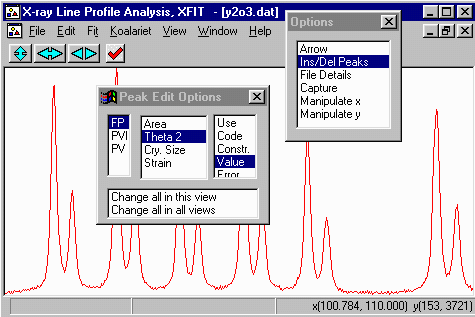
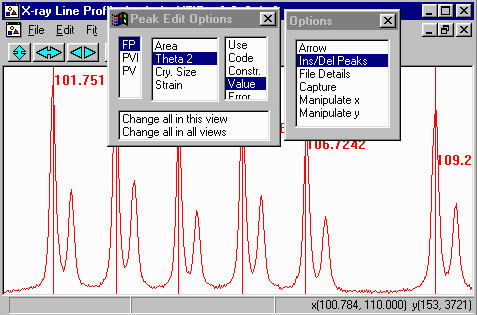
- Within the Options Box, click on Ins/Del Peaks option to
bring up the Peak Edit Options box. If you started XFIT,
the FP (fundamental Parameters) peak type is the default peak type.
- Insert peaks only on the left hand/lower angle CuK alpha peaks.
The CuK beta peak will be automatically fitted when we assign the
lambda files.
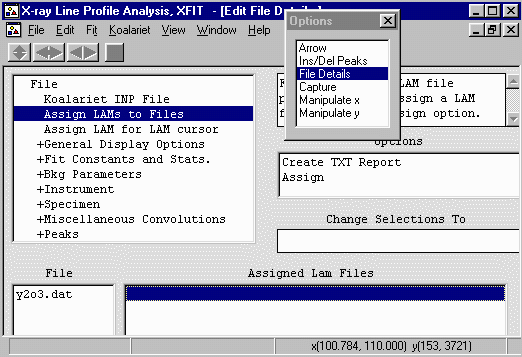
- In the options box, select File Details to bring up the
File Details menu. Select Assign LAMs to Files (3rd from
the top).
Click below the Assign LAM Files to the right
of the y2o3.dat file so that you bring up the Assign option
in the Options area.
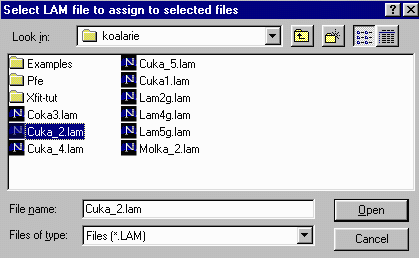
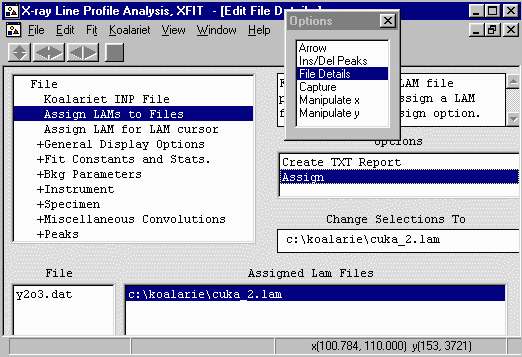
- Then click on the Assign option in the Options area
to bring up the browse box, and go to the c:\koalarie directory
and assign/load the Cuka_2.lam. This describes the
emission spectrum for the Copper K Alpha1 and Alpha2
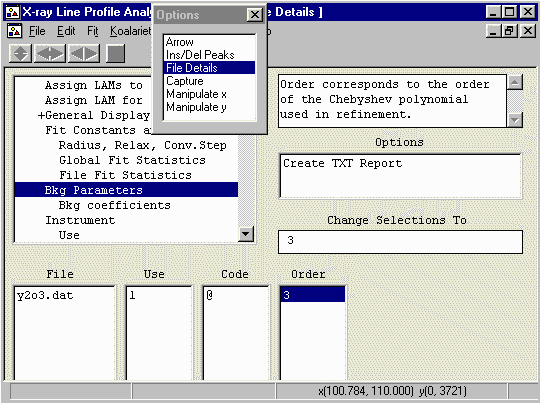
- The background on this particular sample is not nicely
linear so we should allow to polynomial fitting of the
background a bit more flexibility. Still in the
File Details menu, enter Bkg Parameters and set the
Polynomial Order to 3.
Warning: When doing the following, you have to
remember that it is not enough to just set the value of
a parameter in the Value area, but you must also
tell the program that you wish to Use this parameter
in the Use menu area.
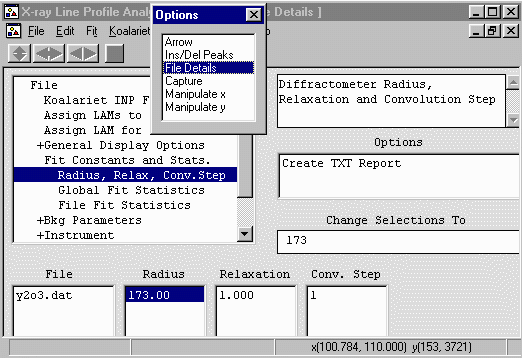
- Still in File Details go down to the Fit Const
and Stats, Radius, Relax Conv.Step to define the diffractometer
radius. This Philips 1710 would have a 173mm radius.
To change a parameter, double click on
the value, modify it in the Change Selections To box and
press enter. This is automatically used so there is no need to
set a Use flag.
- Radius = Goniometer Circle Radius (mm) = 173
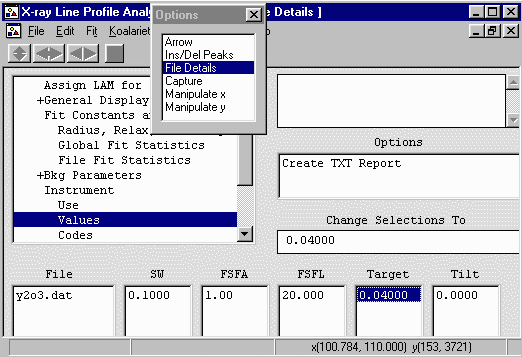
- While still in the File Details go down to the Instrument,
Values to define the diffractometer geometry and tell the
program to use the relevant parameters. (If you use
the method of saving to templates - you would only have to do this
once for your diffractometer). The parameters to
insert here are as follows (and the value for this setting of the
Philips diffractometer). To change the value of a parameter,
double click on the value, modify it in the Change
Selections To box and press enter.
- SW = Receiving Slit Width (mm) = 0.1 USED
- FSFA = Divergence Slit (Fixed Slit system) (degrees) = 1 USED
- FSFL = Irradiated length of the sample (degrees)
for an ADS (automatic divergence slit) (NOT used)
- Target = X-ray Tube Target Size (mm) = Long Fine Focus (LFF) = 0.04 USED
- Tilt = Sample tilt (mm) = 0.0 (NOT used)
(not needed if the sample was packed and loaded correctly)
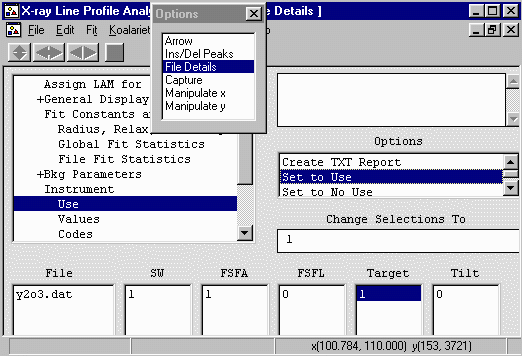
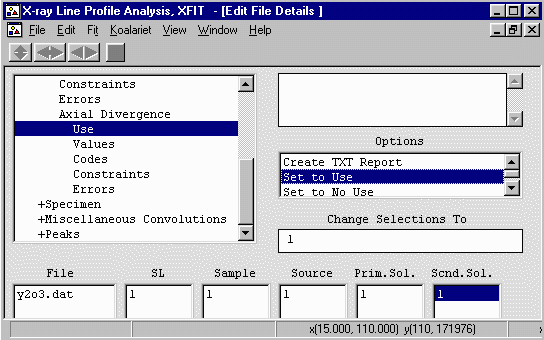
- Now go into the Use option and select use
for SW (Receiving Slit), FSFA (Divergence Slit) and TARGET
- Again, while still in the File Details go down to the Axial
Divergence, Values to define the diffractometer geometry.
The parameters to insert here are as follows (and the value for
this setting of the Philips diffractometer).
- Re Slit = Receiving Slit Length (mm) = 12
- Sample = Sample Irradiation Length Length (mm) = 25 (not 12)
- Source = X-ray Source Length (mm) = 12
- Prim. Sol. =
Acceptance Angle of Incident Beam Sollers Slit (degrees) = 5.1
- Scnd. Sol. =
Acceptance Angle of Diffracted Beam Sollers Slit (degrees) = 5.1
(if you had no diffracted beam Sollers Slit but a diffracted
beam graphite monochromator, you would used 8.3 as a value here
due to accomodate the effects of the monochromator).
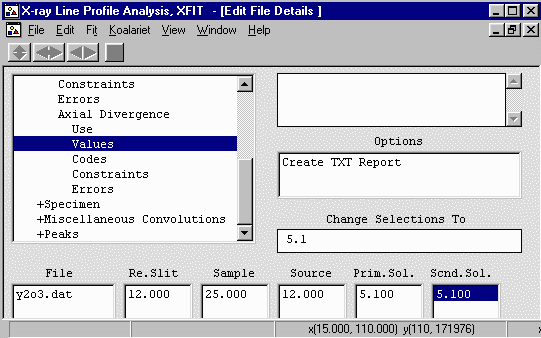
- Now go into the Use option and select use
for all the above parameters.
- If you wanted to insert a linear absorption
coefficient, stay in File Details go to the Axial
Divergence, Values to define the diffractometer geometry.
The parameters to insert here are as follows (and the value for
this setting of the Philips diffractometer). In this case,
we will leave it unused. Even though there is a value inserted
here - if set to Not Use, it will not be applied to the profiles.
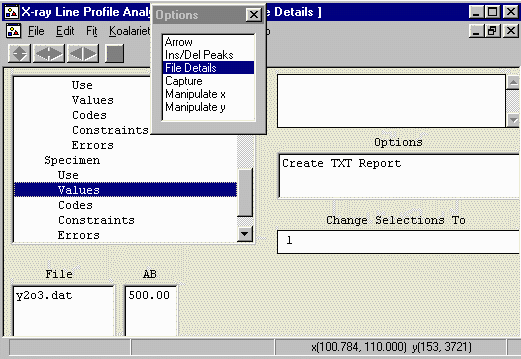
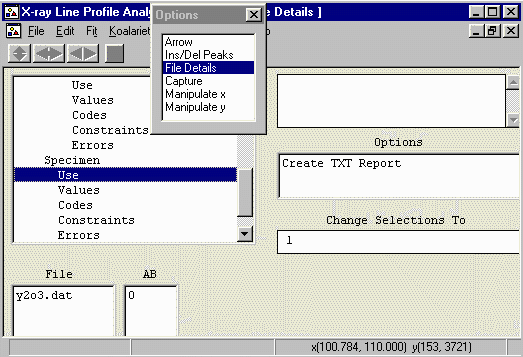
- Now we must tell the program that we wish to Use the
peaks we selected near the top of this tutorial.
While still in File Details, near the bottom of the menu, select
Peaks, Fundamental Parameters Peaks, Use.
File Details, Peaks, Fundamental Parameters Peaks, Use.
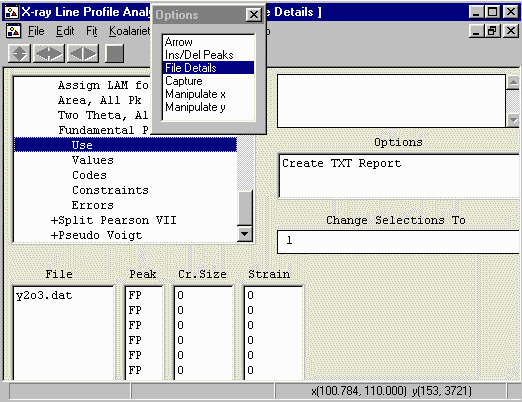
- Highlight all the Cr Size values and set to Use
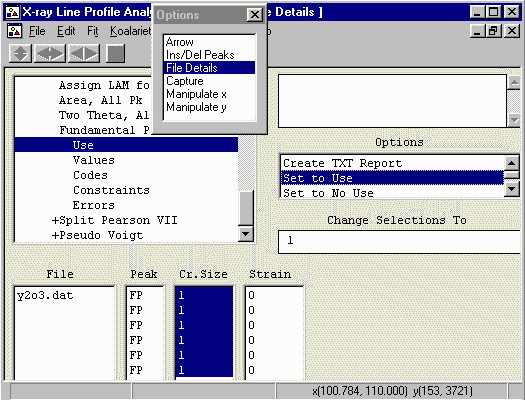
- Highlight all the Strain values and set to Use
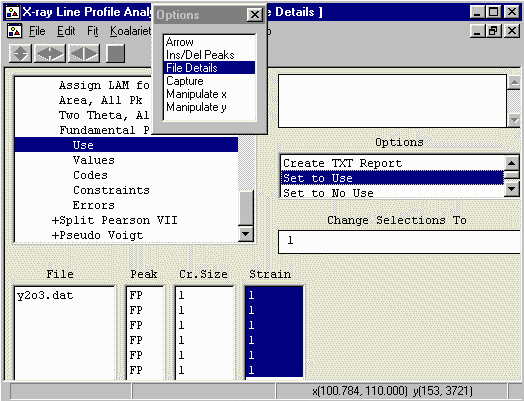
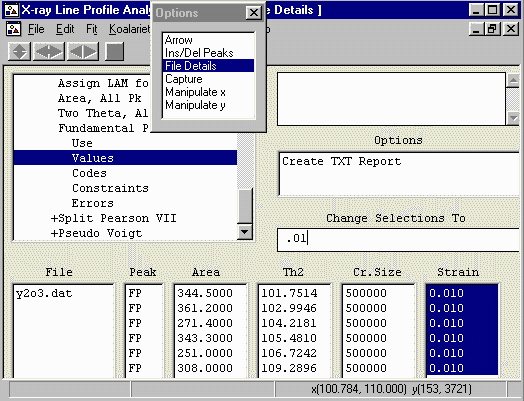
- By default, the strain values are set to 0 - which is not a
legal value for XFIT to handle. Set all the strain values to 0.01.
To do this, highlight all the values, insert 0.01 in the
Change Selections To box and press enter.
- At this point, if the peaks belonged to the same
phase, you could constrain all the peaks to have the
same crystallite size and strain. The advantage of doing
this is that only two independent parameters are refined
per peak (position and intensity). Yttrium Oxide has a
reputation of being a good intensity and
size/strain standard so we can constrain
all the peaks to have the same crystallite size and strain
for the moment.
- Thus refine all the peaks using the same crystallite size
parameters and identical crystallite strain parameters.
To do this, highlight all the values, click in the Change
Selections To and type in the name of "a" codeword.
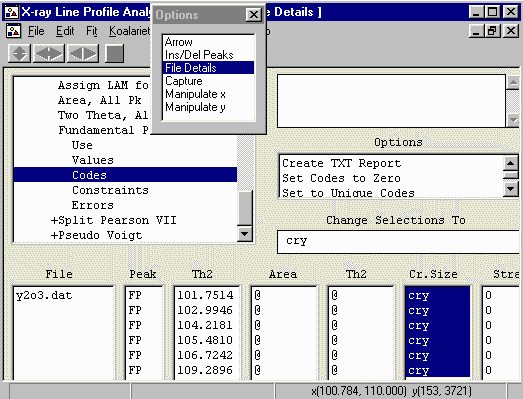
In this case, we will use the word cry (though we
could use any arbitrary word).
- Note that the peak Area and position (Th2) have a @
value. This means they will refine separately (which is the normal
thing) but they can be fixed or constrained as we are doing
with the crystallite size and strain.
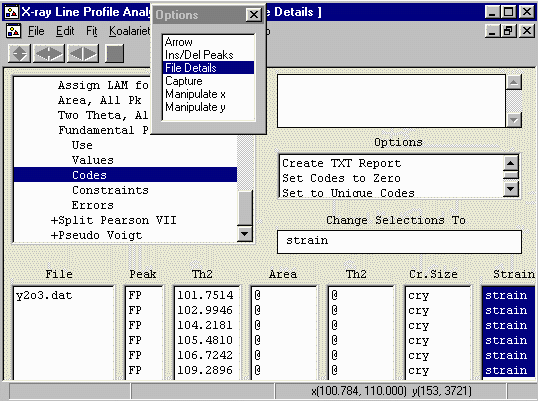
- Refine all the peaks with strain using the same
crystallite strain for each peak.
To do this, highlight all the values, click in the Change
Selections To and type in the name of "a" codeword.
In this case, we will use the word strain (though we
could use any arbitrary word).
- Minimise the File Details window and from the
top menu bar, select Fit, Fit Marqardt.
- This brings up Fit Details box. You have the option to
step through the fitting cycles one at a time. You can stop
on the next cycle - and keep all the information refined up to that
point.
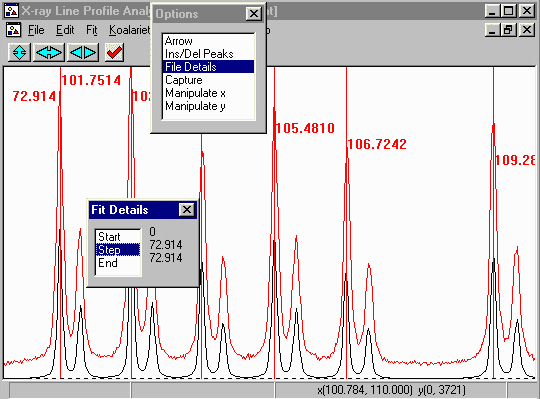
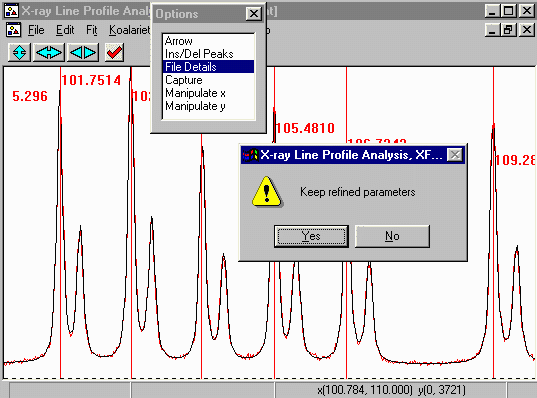
- Click on the Start to start the peak refinement. This
can go rather quickly and when the refinement converges, you will
get a Refinement converged prompt. Press OK and then Yes to keep
the Refined parameters. Notice how the CuK alpha 2 is automatically
fitted due to how we assigned the appropriate LAM file.
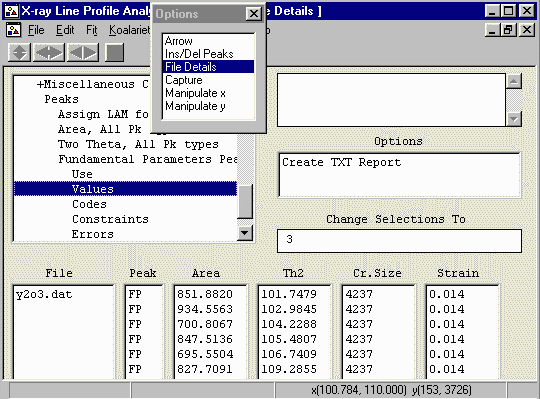
- In File Details, Peaks, Fundamental Parameters Peaks, Values,
Clicking on Create TXT Report will put these into
an ASCII file that can then be saved or copied using [CNTRL] C.
You can also use File, Save Project As to save your work
for future reference or to use the fit as a template for other
similar files.
- Note how the crystallite sizes are all identical and the strain
is all identical.
Obtaining a better fit by better defining the Physics
The main point of the fundamental
parameters approach is that any misfit on the
peaks is due to a lack of understanding of the problem or
incorrectly defining the physics. Modelling of
the peaks is constrained by the physics we have modelled in this
situation, not by arbitrary mathematics. For instance, the
characteristic Copper K radiation lines are not two peaks but five.
Thus if we more accurately describe the radiation, we would expect
a better fit.
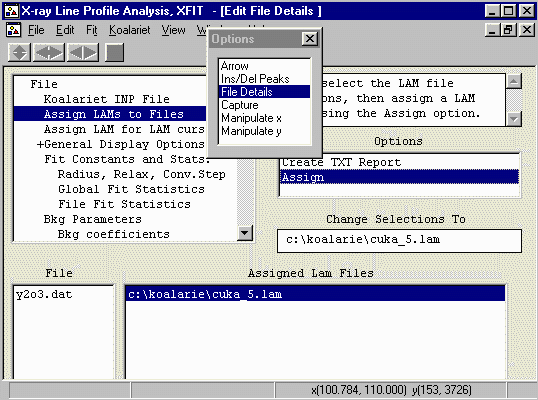
- From the Options Box, go into the File Details, and Assign
LAMs to Files and select Cuka_5.lam - which better defines
the emission profile from the Copper X-ray tube.
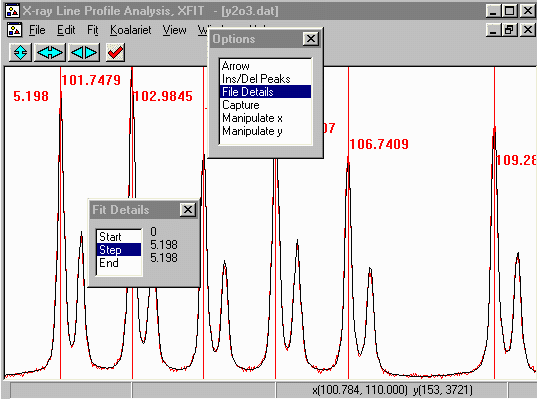
- From the main Top menu, do Fit, Fit Marquardt, not how the
goodness of fit value on the top left of the plot screen is around
5.1. Start the fit off by clicking on Start.
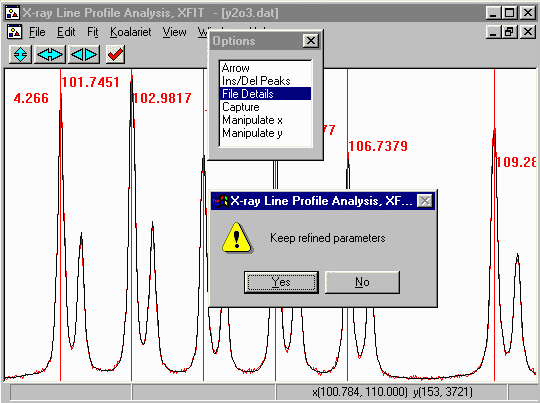
- Notice how after the new round of peak fitting using a more
accurate description of the wavelength, the fit has improved from
5.1 down to 4.2.
Letting all the peaks have Separate Crystallite and Strain Sizes
To let the peaks refine crystallite size and strain
separately, via Options, go to File Details, Peaks, Fundamental Parameters
Peaks, Codes. Highlight the crystallite size refinement flags.
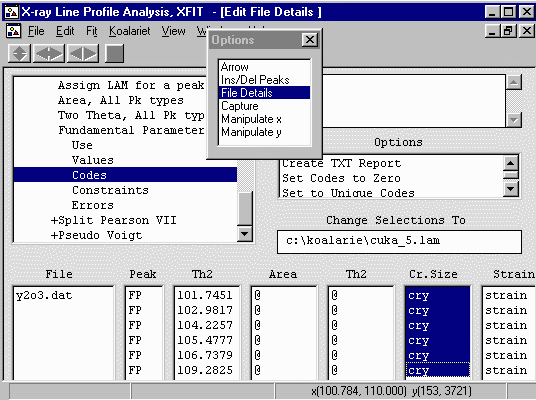
Then click on the Set to Unique Codes
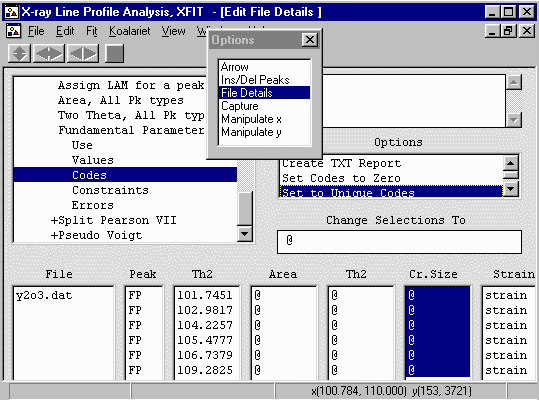
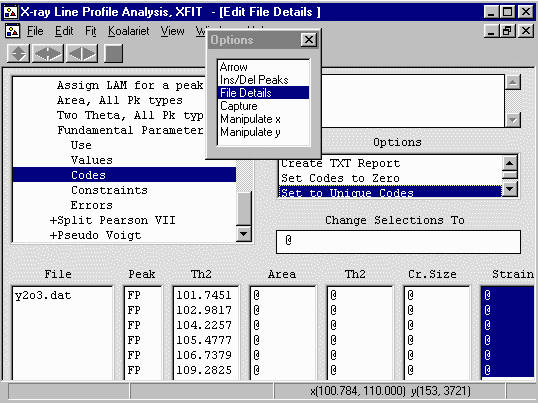
Repeat the above on the Strain Codewords
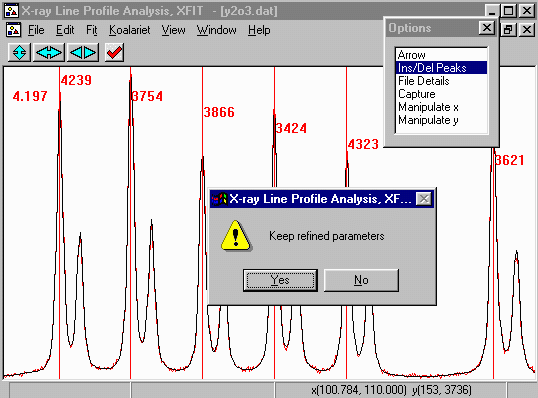
Before you refined this, under Options, Ins/Del Peaks, put the
labels on to Cry Size - which will now label the peaks
with the crystallite size instead of 2-theta labels.
When you refine this, the fit only goes down to from 4.26 to
4.20. Implying there is not much in the way of peak anistoropy.
Fitting of the Low Angle Peaks and Peak Asymmtry
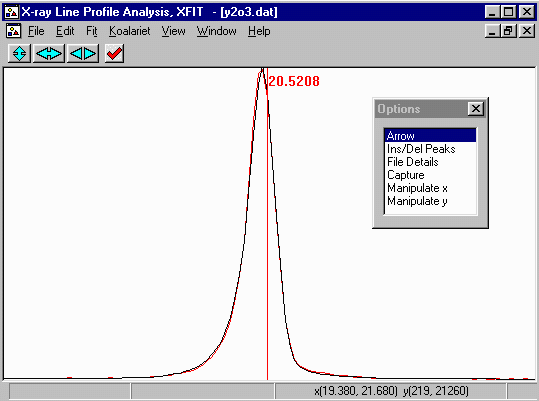
To fit low angle peaks, the procedure is the same
as above. The point to note is that the low angle peak asymmetry
is automatically refined without the need for separate
parameters. You will note that the XFIT peak position seems to
be offset. This is not an error but is the 2-theta peak
position calculated from the d-spacing of the emission profile
that had the largest intensity. At low angles, the 2-theta
position does not generally coincide with the peak maximum.
This is due to the instrument and specimen aberations that move
the peak maximum. XFIT gives you a peak position of the peak
maximum as if the data was collected on a perfect instrument
with monochromatic radiation.


